Planning a trip to Canada? Whether you’re visiting family, exploring the stunning landscapes, or just experiencing the vibrant cities, getting your Canada tourist visa is the first step. If you’re wondering how to apply for a Canada visitor visa online, you’re in the right place! I’ll walk you through the entire process, sharing tips and details from my own experience applying for a visa for myself and my parents. Let’s dive in!
Table of Contents
- What You Need Before You Start
- Step 1: Applying Online
- Step 2: Booking and Attending Your Biometrics Appointment
- Step 3: Waiting for Approval
- Step 4: Submitting Your Passport
- Step 5: Collecting Your Passport with Visa
- Creating Your IRCC Account and Filling Out the Application
- Filling Out Personal Details and Travel History
- Additional Questions and Background Information
- Reviewing and Uploading Supporting Documents
- Making Payment and Finalizing Your Application
- Frequently Asked Questions (FAQ)
- Final Thoughts
What You Need Before You Start
Before applying, make sure you have a valid identity document, like a passport. For most applicants aged 14 to 79, biometrics—your fingerprints and a photo—are mandatory and must be collected in person. If you fall into this age group, you don’t need to upload a separate photo because it will be taken during your biometrics appointment.
For applicants outside this age range, you will need to upload a photo as part of your application.
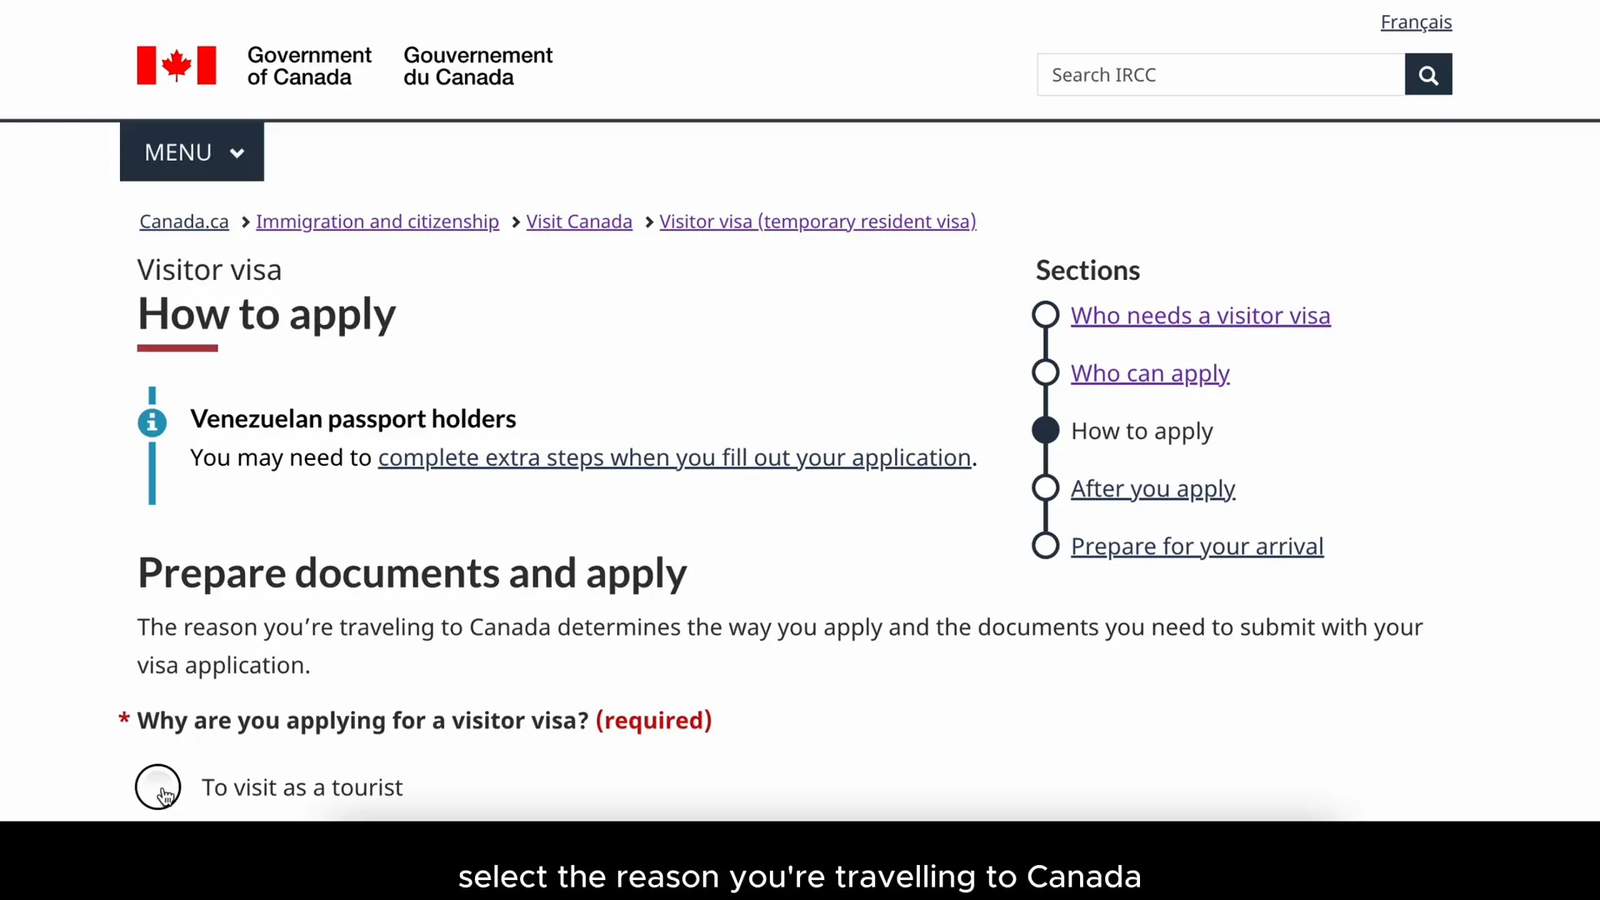
Step 1: Applying Online
Start by going to the official Government of Canada website for visitor visas: Apply for a Canada Visitor Visa. You’ll be asked to select the reason for your travel and then complete an online application form.
Here’s what you’ll need to do:
- Complete the online application form with accurate personal details.
- Upload all the required supporting documents.
- Provide proof that you can afford your trip (like bank statements).
- Make the visa application payment online.
Once you submit your application, you’ll receive a letter asking you to visit a biometric collection service point in person to have your fingerprints and photo taken.
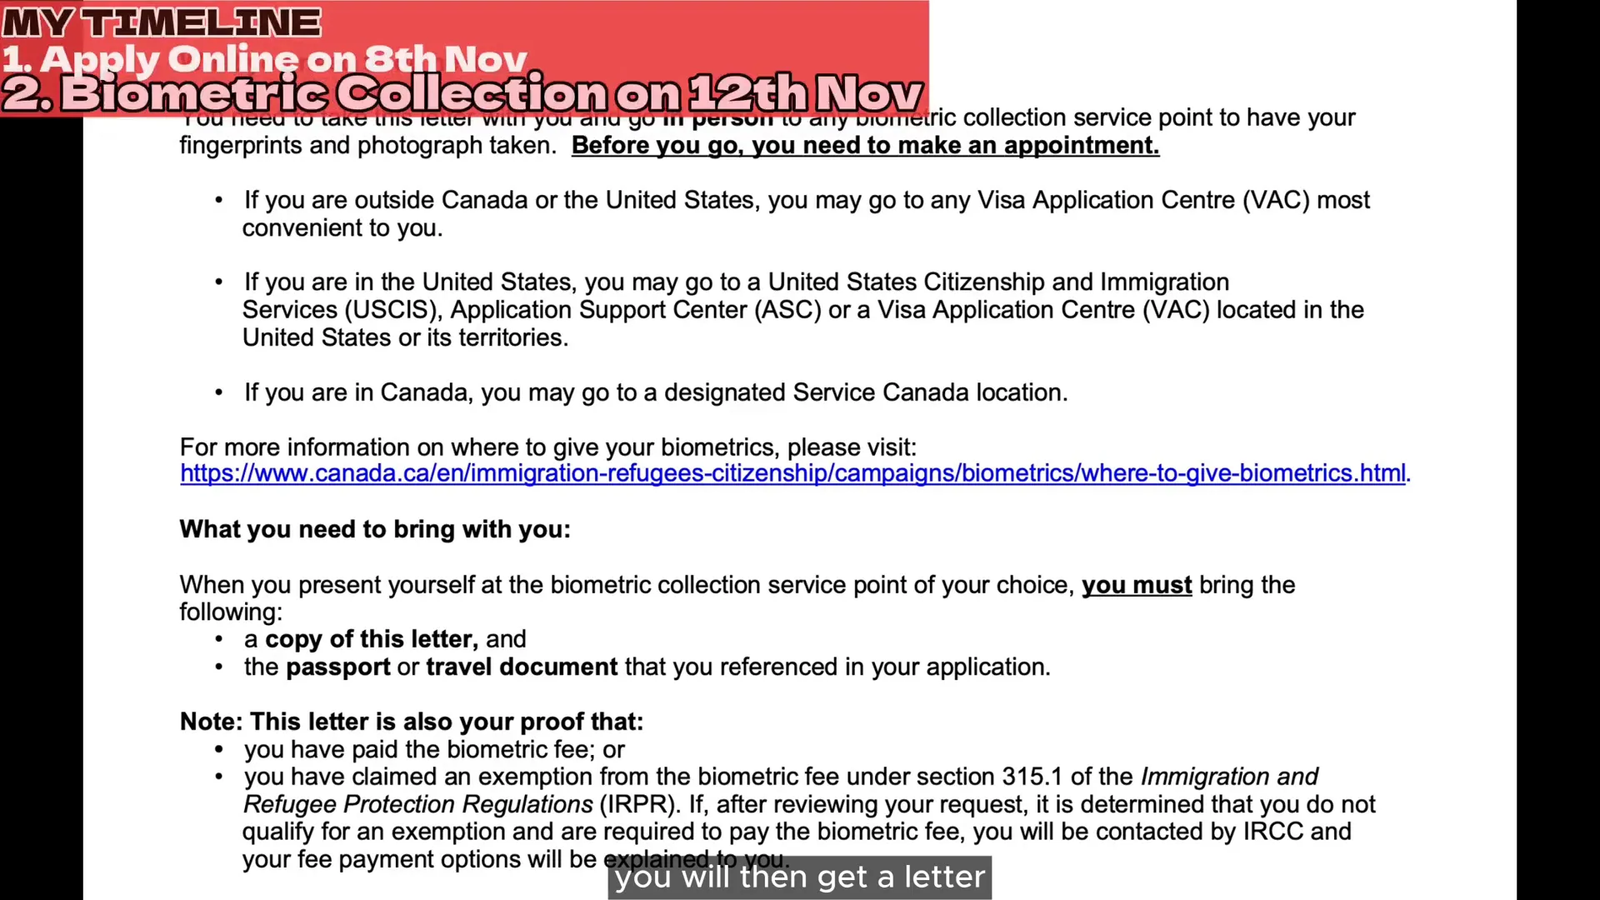
Step 2: Booking and Attending Your Biometrics Appointment
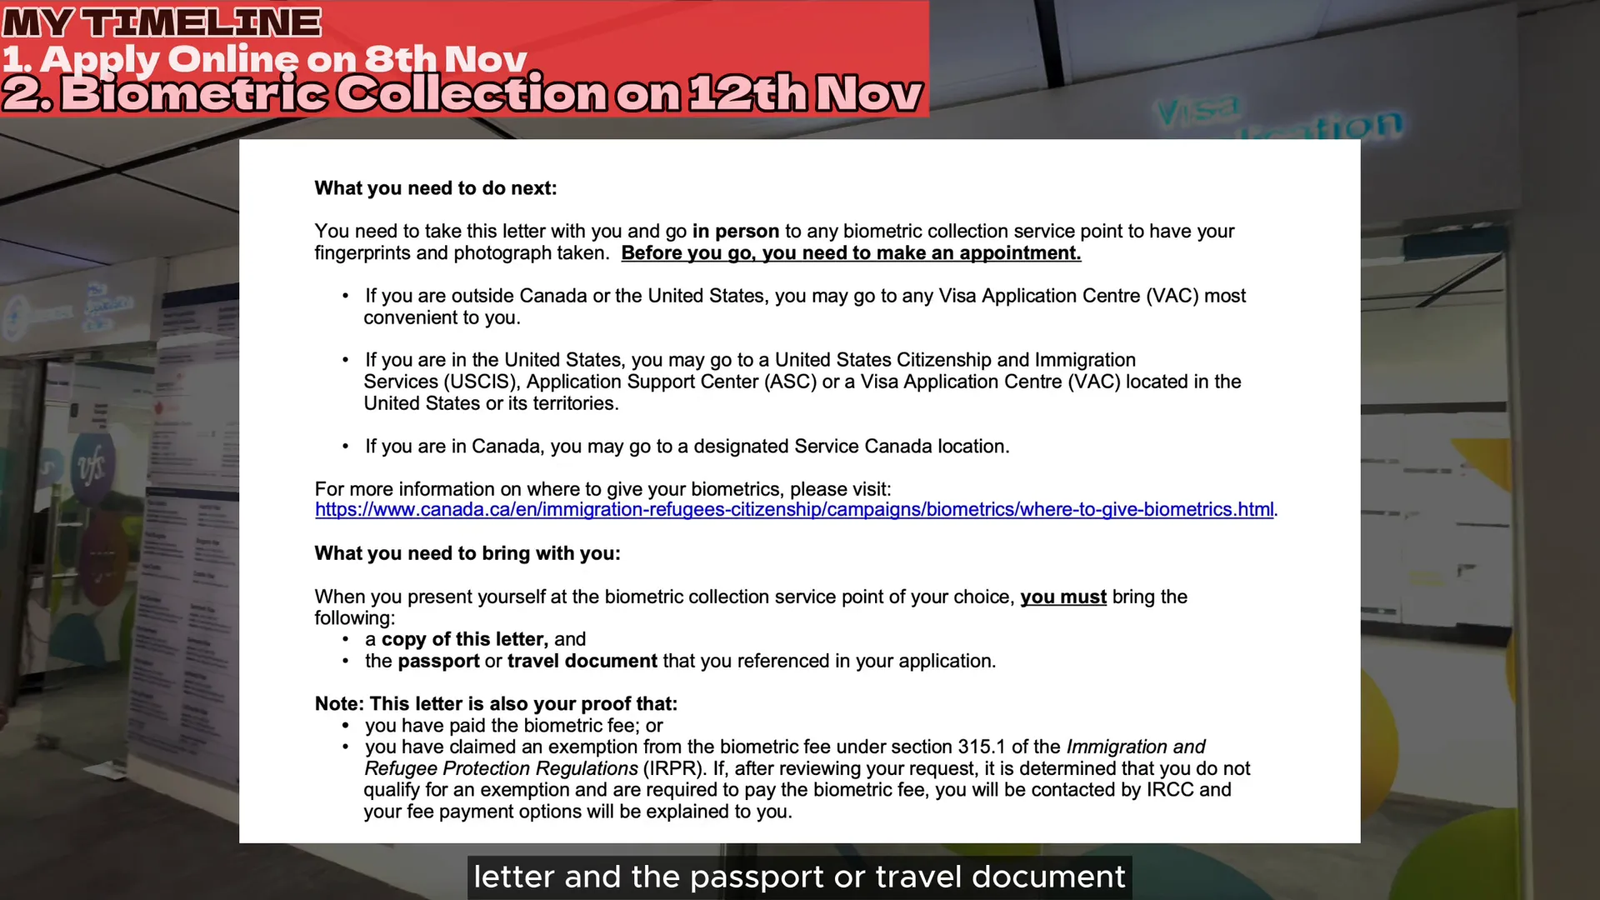
Before you go for your biometrics appointment, you need to book an appointment online. When you go to the biometric collection service point, bring:
- A copy of your biometric instruction letter.
- Your passport or travel document.
- Depending on your location, you might also need a printed copy of your passport biodata page and a consent form.
Biometrics are mandatory for all foreign nationals aged 14 to 79. This step is crucial because it links your identity securely to your visa application.
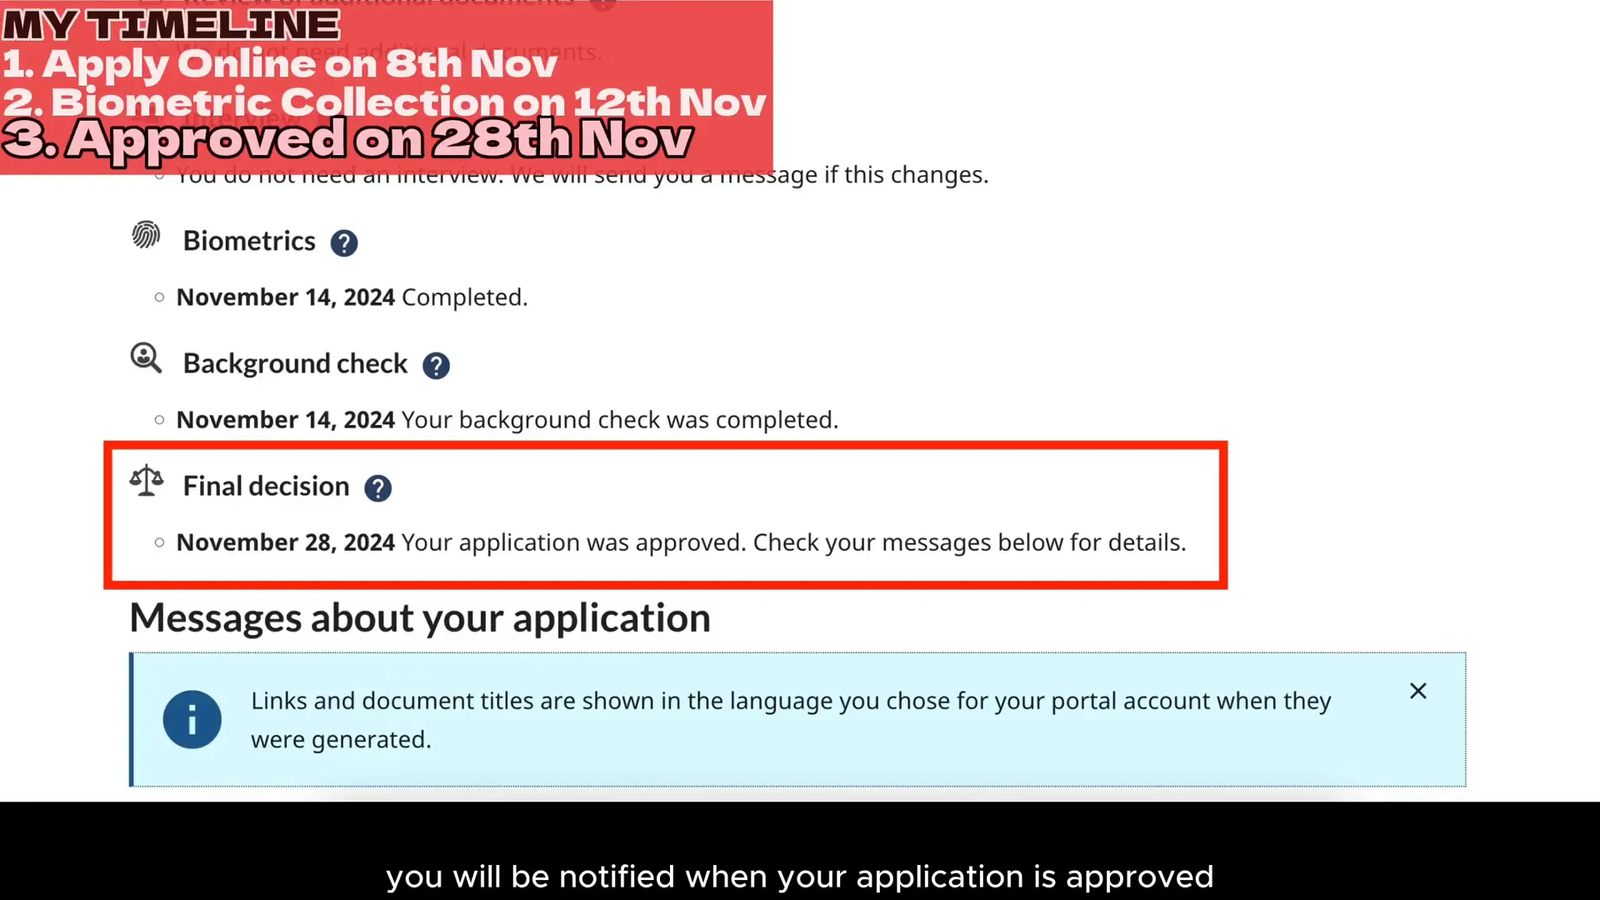
Step 3: Waiting for Approval
After you complete your biometrics, the next step is to wait for your application to be processed. When your visa application is approved, you’ll receive a letter telling you to submit your passport to the visa application center so they can attach the visa sticker.
This part can take some time, so be patient. In my case, it took about 16 days from application to approval.
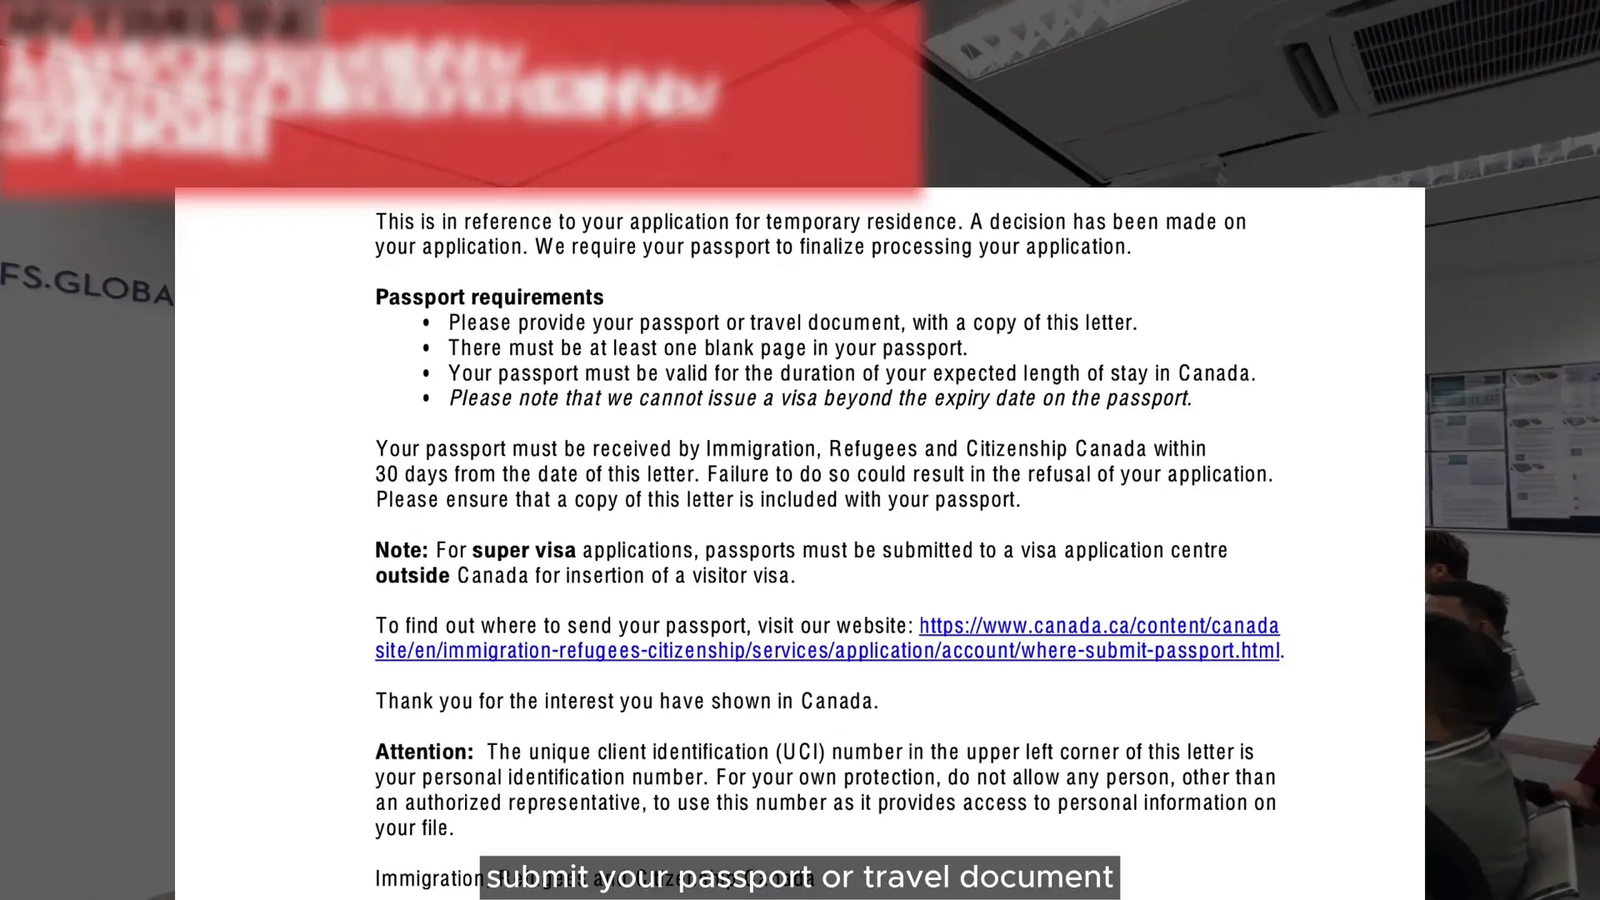
Step 4: Submitting Your Passport
Once you receive the approval letter, you need to send your passport or travel document to the visa application center. Here’s what to remember:
- Bring a copy of the passport submission letter.
- Bring a consent form if required.
- Payment might be needed if you want your passport couriered back or to receive updates.
You don’t usually need an appointment to submit your passport. After submission, you’ll get a receipt, which you should keep safe because you’ll need it to collect your passport later.
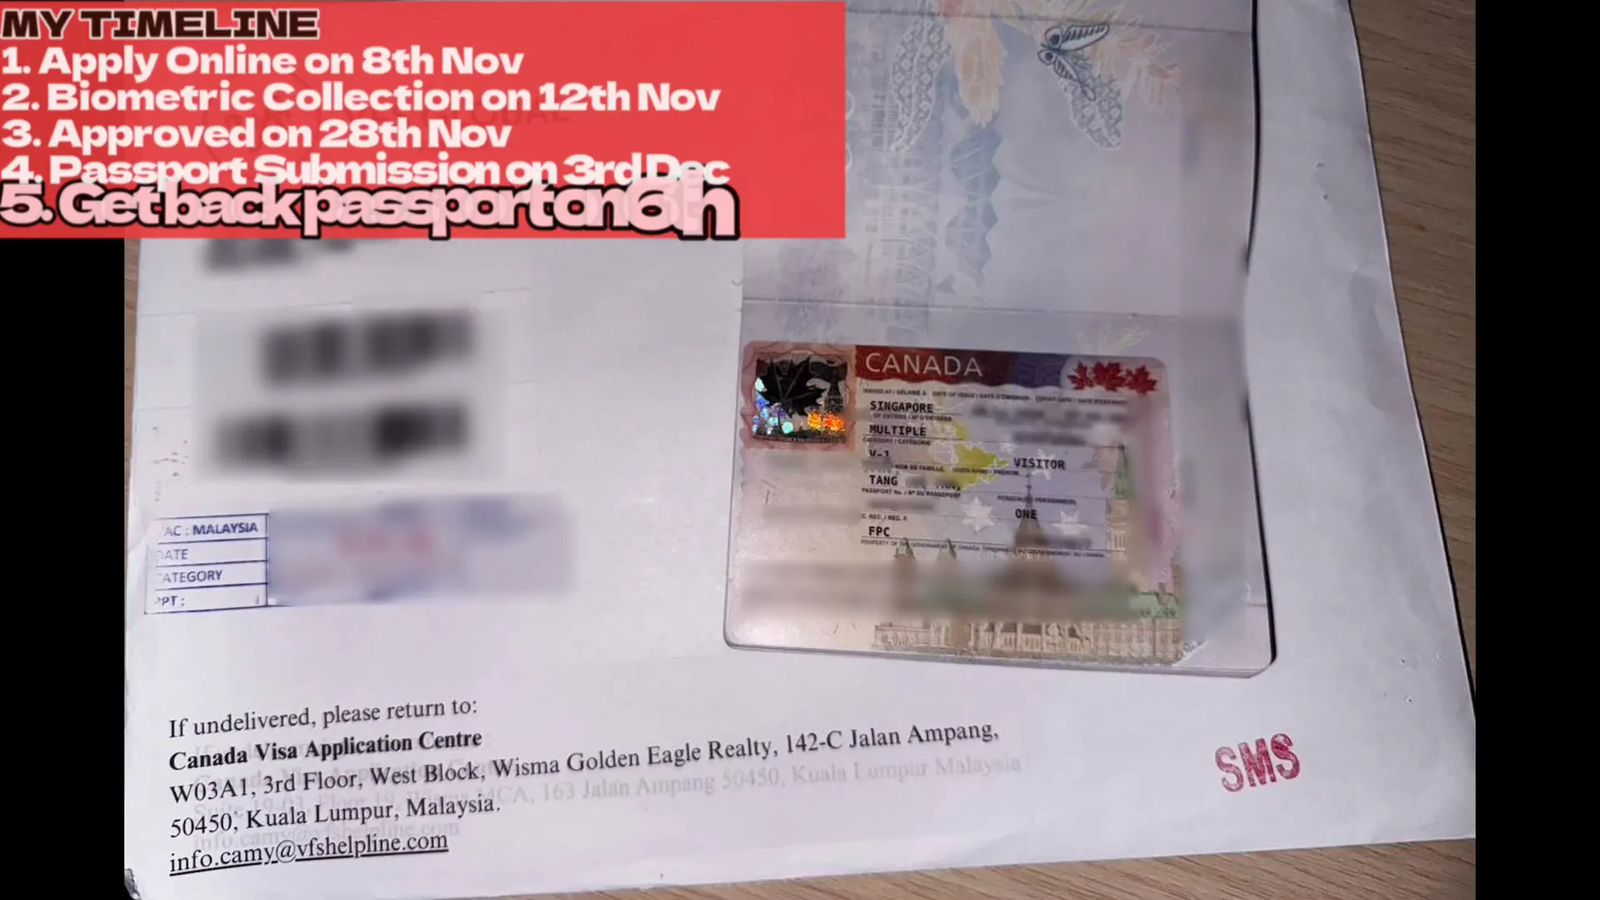
Step 5: Collecting Your Passport with Visa
Once your visa is stamped onto your passport, you’ll be notified that it’s ready for pickup. Bring your receipt and any other required documents to collect your passport. If you opted for courier service, your passport will be sent to your address.
My passport with the visa was ready just a few days after submission, making the whole process smooth and straightforward.
Creating Your IRCC Account and Filling Out the Application
If you’re a first-time user of the Immigration, Refugees and Citizenship Canada (IRCC) portal, here’s how to get started:
- Request an invitation code by entering your email address.
- Receive the code via email and use it to create your account.
- Complete the registration form and sign up.
- Sign in to your new account.
Once logged in, you’ll need to:
- Read and accept the terms and conditions.
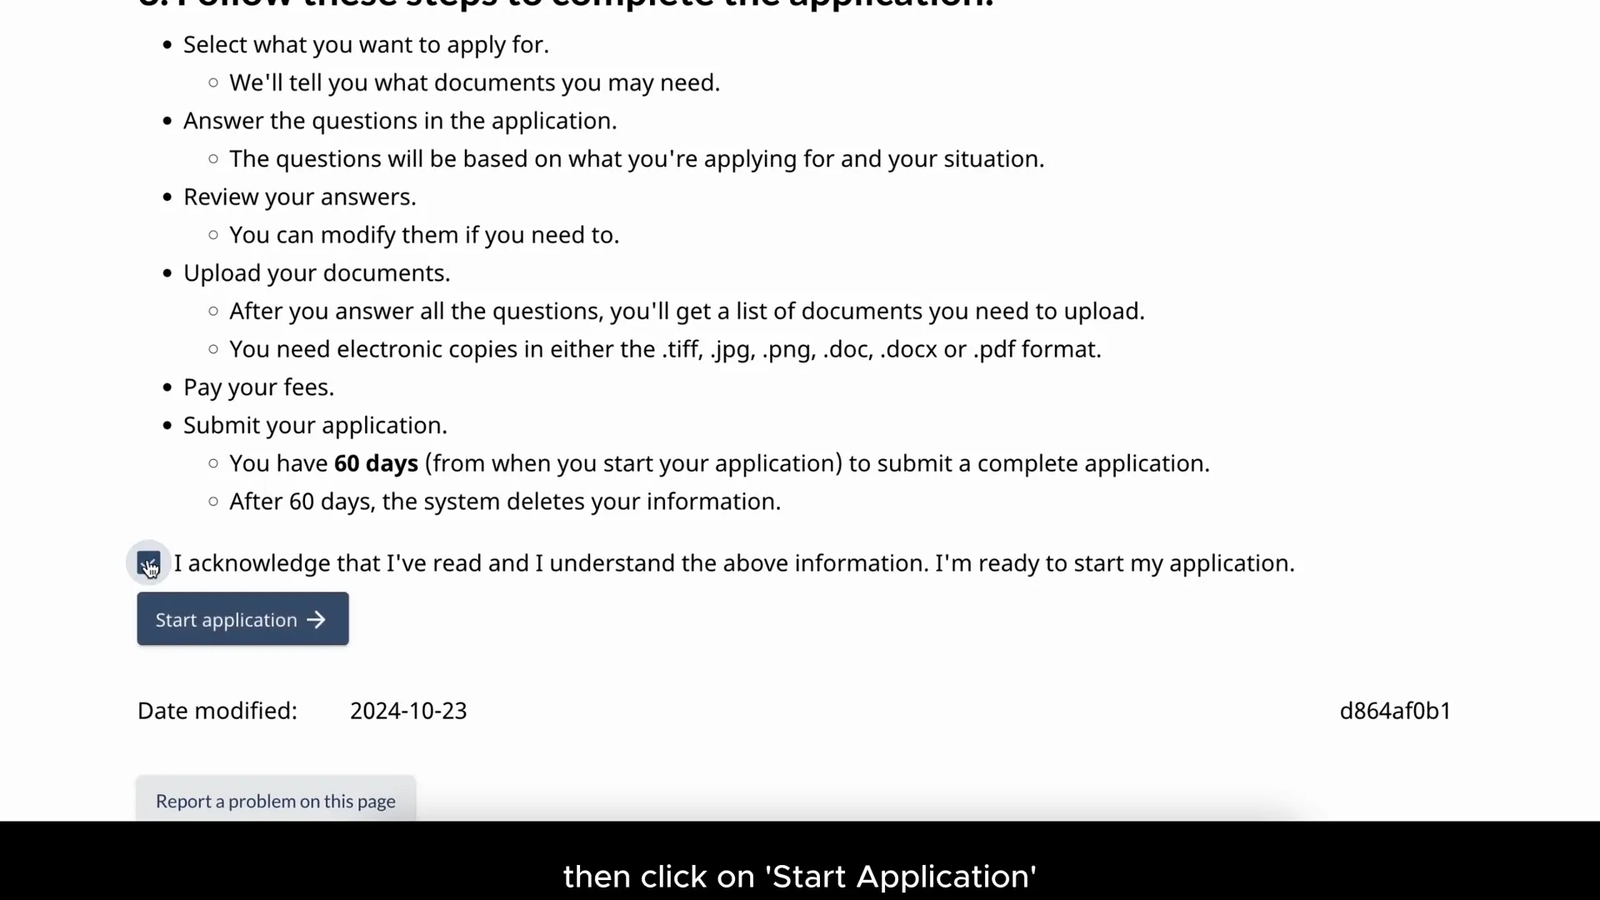
- Click “Apply” and acknowledge that you understand the application information.
- Start your application.
When applying for yourself and your family, you can select “Yes” to apply for a group. Enter your group’s name and specify the visa type. You’ll also need to explain your travel plans in Canada and provide your arrival and departure dates.
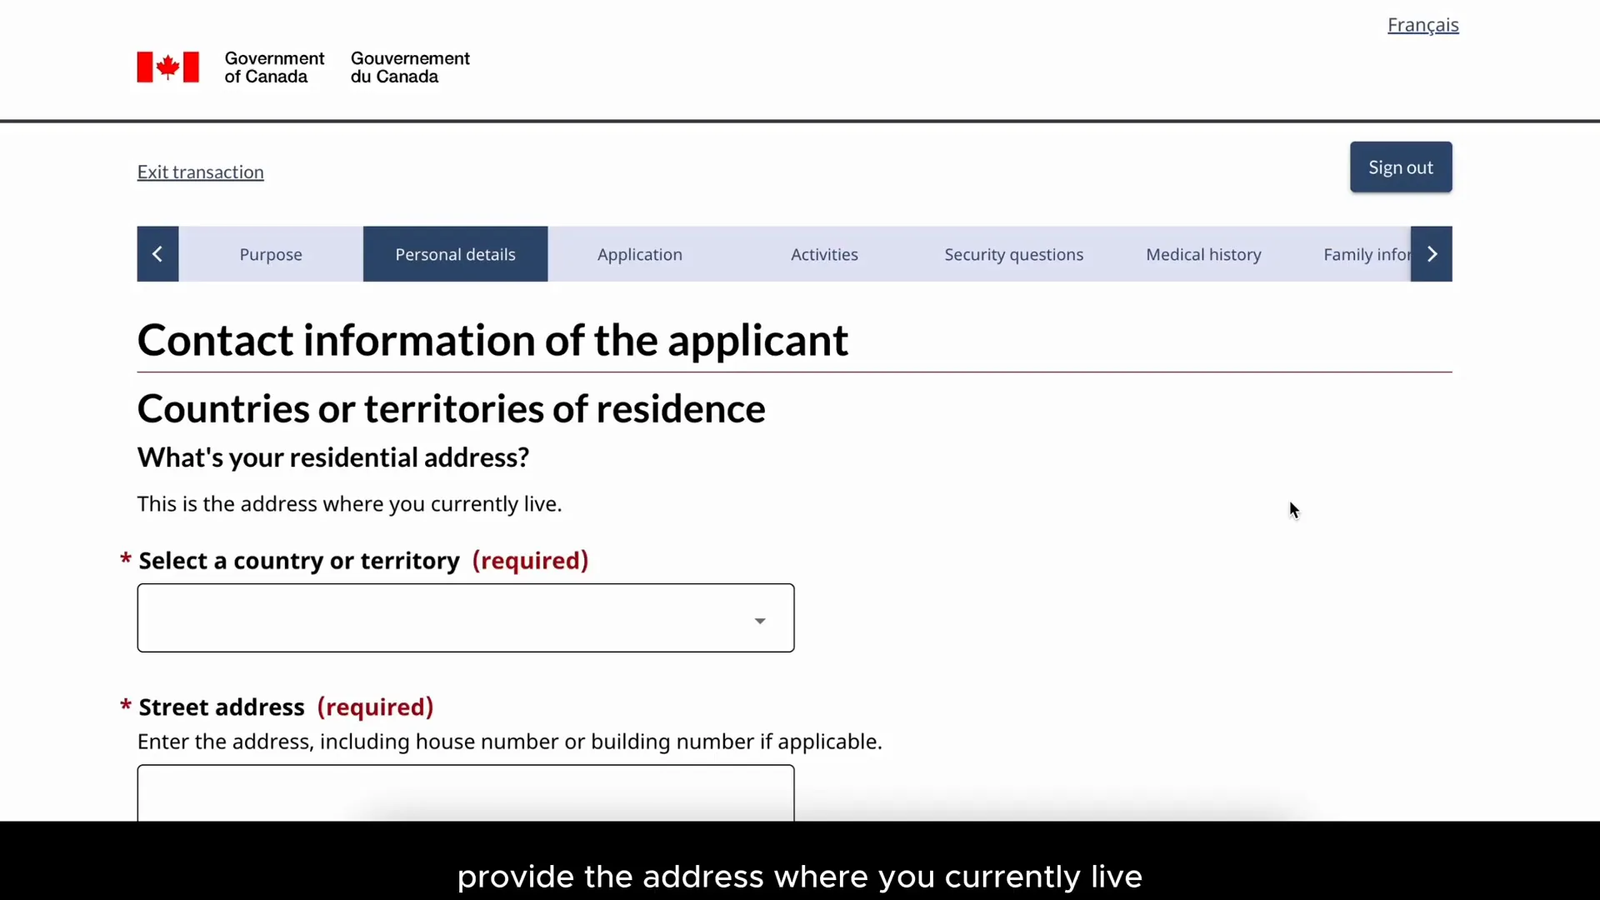
Filling Out Personal Details and Travel History
The application requires detailed personal information, including:
- Applicant’s full name, date of birth, and gender.
- Travel document details and citizenship.
- Any previous names used.
- Current residential address and all countries you’ve lived in for more than 6 months over the past 5 years.
- Whether you have provided biometrics to Canada in the last 10 years.
You’ll also need to provide financial information, like how much money you have for your stay and whether someone else is funding your trip. Bank statements or other financial documents are necessary to prove this.
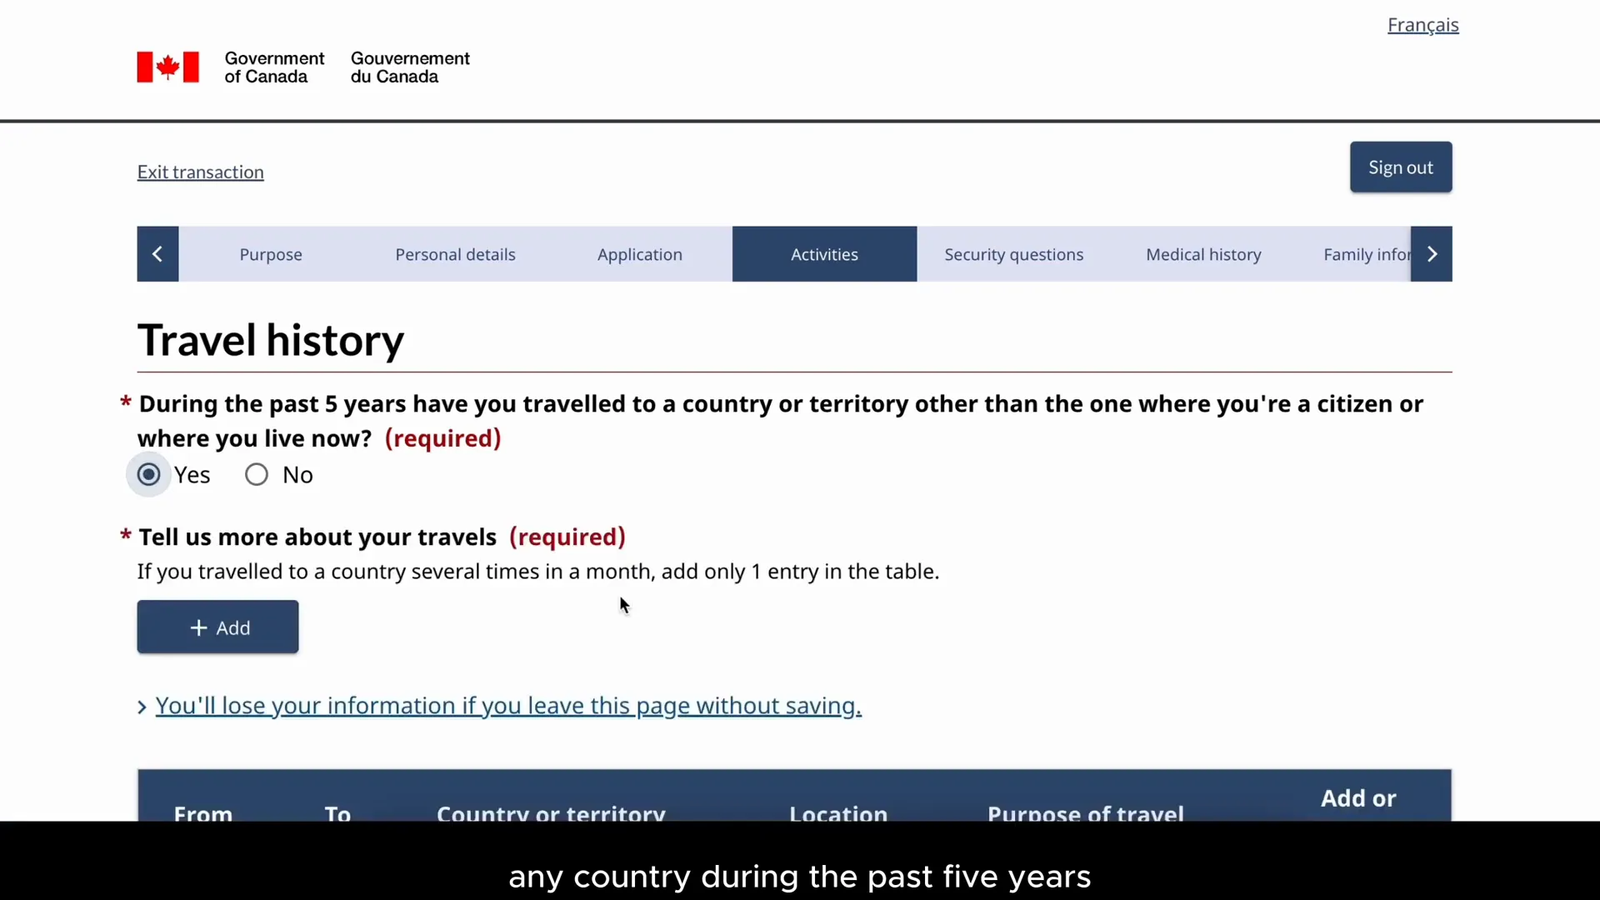
Additional Questions and Background Information
The application asks about your educational history, military or police service, travel history from the past five years, and any criminal or security concerns. You’ll also provide information about your medical background, marital status, spouse, children, and parents.
Don’t forget to include your preferred language, email address, and phone number for communication.
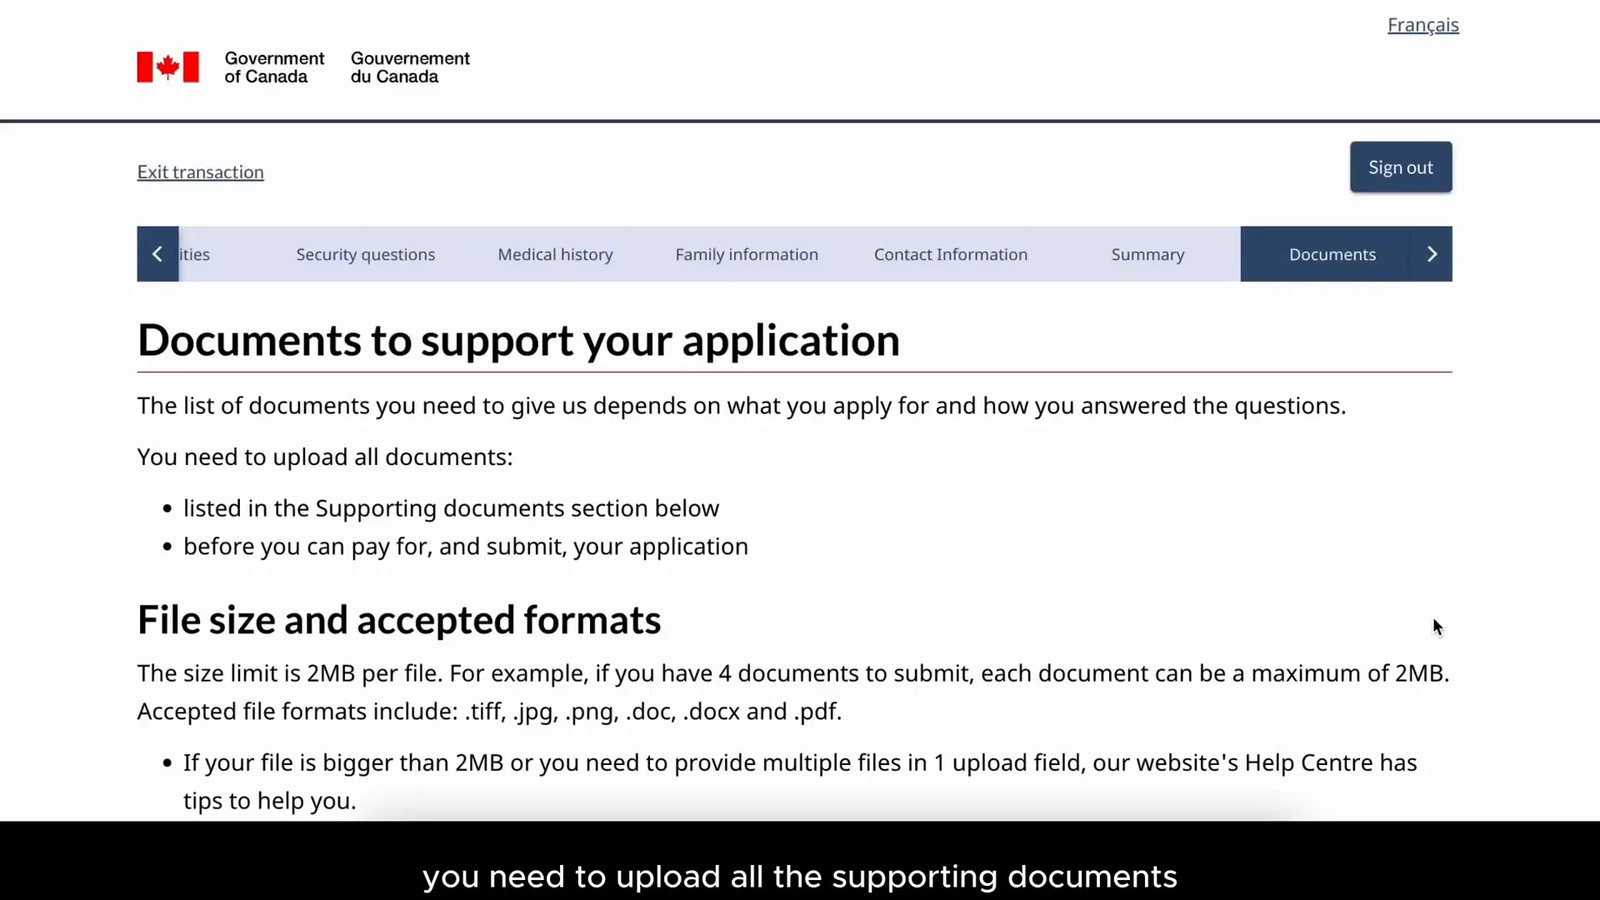
Reviewing and Uploading Supporting Documents
After filling out all the details, you can review your answers and make corrections if needed. Then, it’s time to upload your supporting documents. These documents should demonstrate that you can afford your trip and that you will return to your home country after your visit.
Tip: You can combine multiple documents into a single PDF file for easy upload.
Making Payment and Finalizing Your Application
The final step is to pay the application fee online. Once payment is completed, your application will be officially submitted for processing.
Remember, the whole process—from applying to receiving your visa—requires patience and attention to detail. But with this step-by-step guide, you’ll have a much smoother experience.
Frequently Asked Questions (FAQ)
Do I need to provide biometrics for a Canada tourist visa?
Yes, biometrics (fingerprints and photo) are mandatory for all foreign nationals aged 14 to 79. You must visit a biometric collection service point in person.
Can I apply for a visa on behalf of my child?
Yes, adults can apply on behalf of their children without being considered representatives or agents.
How long does it take to get a Canadian tourist visa?
Processing times vary, but in my experience, it took about 16 days for approval after submitting the application and biometrics.
What documents do I need to prove I can afford my trip?
Bank statements, proof of employment, or financial support documents are commonly required to demonstrate you have enough funds for your stay.
Is it necessary to submit my passport in person?
You usually need to submit your passport to the visa application center for the visa sticker to be attached. This may not require an appointment, depending on your location.
Can I track the progress of my visa application?
Yes, by creating an IRCC account and using the visa application center’s services, you can receive updates and notifications about your application status.
Final Thoughts
Applying for a Canadian tourist visa online might seem overwhelming at first, but breaking it down into simple steps helps a lot. Make sure you have all your documents ready, follow the instructions carefully, and be honest in your answers. Don’t forget to book your biometrics appointment promptly, as this is a mandatory part of the process.
With the right preparation and patience, you’ll have your Canada tourist visa in hand and be ready to explore everything this beautiful country has to offer. Safe travels!

Zahid arrived in Canada in February 2021 as a master’s student in business analytics at Carleton University in Ottawa, Ontario, in -30°C weather with no prior knowledge of the country. Over the following years, he independently navigated everything from mortgage research and PR applications to driving licenses, postgraduate work permits, and exploring both the East and West coasts of Canada.
He created Canada Wander to share the practical, experience-based guides he wished had existed when he arrived—helping other newcomers skip the frustration and navigate Canadian life with confidence.